
Take-All Root Rot: Why Bare Patches in Your Lawn Refuse to
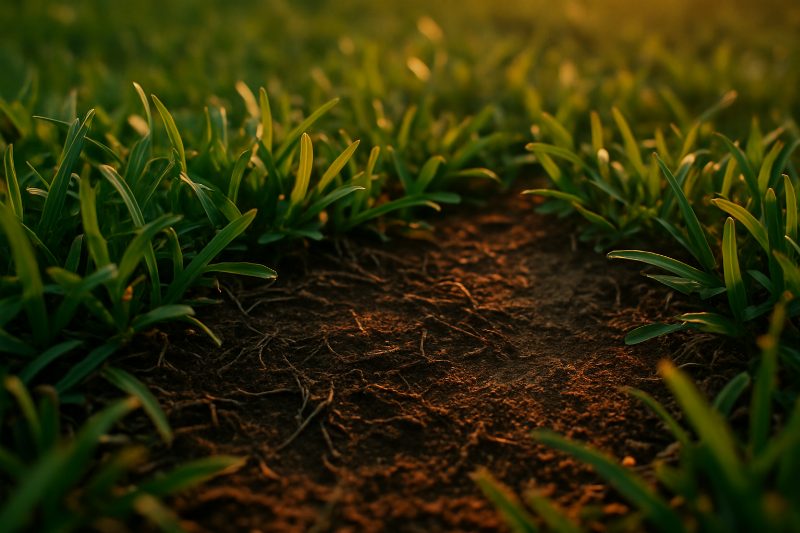
Those bare patches showed up a few months ago, you watered more, maybe tossed down some fertilizer, and yet the grass is no better - possibly worse. That is the hallmark cruelty of Take-All Root Rot, and understanding why it works that way is the first step toward actually beating it.
Take-All Root Rot (caused by the soil fungus Gaeumannomyces graminis var. graminis) is one of the most misdiagnosed and mismanaged turf diseases in Florida. It thrives in our warm, wet summers, it operates underground where you cannot see it, and it responds badly to the very things most homeowners instinctively try. If your St. Augustine lawn in Bradenton, Lakewood Ranch, Parrish, or anywhere else in the region has patches that refuse to fill in, keep reading, because this post covers everything you need to understand the disease and get your turf back on track.
What Take-All Root Rot Actually Does to Your Grass
The name tells you a lot. The fungus attacks the root system, not the leaf blade. By the time you see a yellowing, thinning, or bare area on the surface, the roots and stolons beneath it have already been rotted away. There is nothing left to support new growth, which is why the patch will not bounce back no matter how much you water.
Here is the specific sequence of events:
- Gaeumannomyces graminis infects roots and stolons in the soil, colonizing them and cutting off the grass plant's ability to take up water and nutrients.
- Leaves begin to yellow and thin, often resembling drought stress or a nutrient deficiency. Homeowners add water or fertilizer, which can actually accelerate the fungal spread.
- Roots turn black and rot away completely. If you pull up a sprig of affected grass, the roots crumble or pull free with almost no resistance.
- The stolon network, which is St. Augustine's main way of spreading laterally to fill bare spots, is also destroyed. So even if new grass creeps in from the edge, the fungus is often still active in the soil and will take out the new growth, too.
This underground destruction is why so many homeowners spend months chasing a problem that seems to have no solution. The grass cannot regenerate what it has lost because the very machinery for regeneration has been killed.
Why Florida Lawns Are So Vulnerable
Florida's climate is a near-perfect incubator for this fungus. The combination of warm soil temperatures, high humidity, and regular summer rainfall creates sustained wet conditions at the root zone. Manatee County sits right in the middle of this zone, and lawns from Anna Maria Island inland to Parrish and Ellenton all face the same seasonal risk window.
Several specific conditions make an individual lawn more susceptible:
Excessive moisture. Overwatering is probably the single biggest contributing factor in home lawns. Irrigation systems set too frequently keep the soil surface perpetually moist, which is exactly what the fungus needs to spread. If your system runs every day or even every other day during the rainy season, you are likely overwatering.
Soil pH that is too high. Take-All Root Rot thrives in alkaline soils. Many lawns in our area have naturally high pH due to limestone-based soils, and the use of certain fertilizers can push pH even higher over time. A simple soil test (available through the UF/IFAS extension office) can tell you where your pH stands.
High nitrogen at the wrong time. Pushing the lawn with quick-release nitrogen fertilizer when the fungus is active stimulates lush, soft leaf growth while doing nothing to help the roots, and can actually feed the disease by keeping the soil environment favorable.
Thatch accumulation. A thick thatch layer holds moisture right at the crown of the plant, creating a wet microclimate that the fungus exploits. Scalping a lawn too aggressively or mowing at the wrong height contributes to thatch buildup over time.
Compacted soil. Poor drainage caused by compacted soil keeps the root zone wet long after rain or irrigation events, extending the window during which the fungus can move through the soil.
How to Tell It Apart from Other Problems
Take-All Root Rot looks similar enough to other common lawn problems that misdiagnosis is extremely common. Before you treat for the wrong thing, work through this checklist.
Check the roots. Pull up a plug of grass at the edge of the affected area (the edge, not the dead center, is where active disease is found). Healthy St. Augustine roots are white to cream-colored and firm. Roots infected with Take-All Root Rot will be black, rotted, and will separate from the stolon easily. This is the single most reliable field test you can do.
Look at the pattern. Take-All Root Rot typically produces irregular patches that may merge into large, sprawling affected areas. The edges are often yellowish, transitioning into the dead zone. Perfectly circular patches may point to a different issue.
Rule out chinch bugs. Chinch bugs are a very common cause of bare patches in St. Augustine grass in Florida and the symptoms can look nearly identical at first glance. The key difference is the root system: chinch bugs damage the plant above the soil, so roots are still intact and firm. Check out our post on chinch bugs vs. drought stress in St. Augustine grass for a detailed breakdown of how to tell them apart.
Rule out gray leaf spot. Gray leaf spot is a foliar fungus that shows up on the leaf blade itself as small lesions with gray centers. If the visible damage is primarily on the leaves rather than resulting in full bare patches with dead root systems, gray leaf spot may be the culprit. Our post on gray leaf spot in St. Augustine grass covers identification and treatment in detail.
Consider mole crickets. Mole crickets tunnel through the root zone and can cause patchy die-off that resembles root rot. If you see small tunnels and the soil feels spongy underfoot, read up on spotting mole cricket tunnels before they ruin your turf.
If the roots are black and the affected area has been slowly expanding despite your best efforts, Take-All Root Rot is the most likely diagnosis.
A Step-by-Step Recovery Plan
Recovering from Take-All Root Rot is not quick, but it is absolutely doable with a consistent approach. Expect a realistic timeline of one full growing season for moderate cases, and possibly two seasons for severe or widespread infections.
Step 1 - Correct your watering schedule immediately
This is the highest-priority change. Cut irrigation frequency to once or twice per week during the dry season, and turn the system off entirely during periods of regular summer rainfall. Water deeply but infrequently to encourage deeper root growth. The goal is to let the top inch of soil dry out between irrigation events. Many homeowners in Lakewood Ranch and Parrish who have automated irrigation systems have never revisited the default schedule since installation. Now is the time.
Step 2 - Test and adjust soil pH
Take-All Root Rot is significantly suppressed in soils with a slightly acidic pH (ideally in the 6.0 to 6.5 range). Most affected lawns in this area have pH readings above 7.0. Sulfur applications can lower pH over time, but the process is gradual and needs to be managed carefully. Follow a soil test result rather than guessing at application rates.
Step 3 - Apply a labeled fungicide
Fungicides containing azoxystrobin, propiconazole, or thiophanate-methyl have shown efficacy against Take-All Root Rot when applied correctly. The critical detail here is timing and method. The fungicide needs to be watered in to reach the root zone, but not so aggressively that it is flushed past the roots. Multiple applications are typically needed (often on a 28-day cycle) because the fungus can persist in the soil for extended periods.
Over-the-counter products vary widely in their active ingredient concentrations and labeled uses. If you are not confident in selecting and applying a fungicide, this is a case where professional help pays for itself quickly, because a wrong or incomplete application wastes money and time while the fungus continues to spread.
Step 4 - Avoid high-nitrogen fertilizer during active infection
Switch to a fertilizer with a lower nitrogen ratio and avoid quick-release nitrogen entirely until the lawn has recovered. Some turf professionals recommend potassium-heavy nutrition during recovery, as potassium supports root development and stress tolerance. Slow-release formulations are gentler on a lawn that is already under stress.
Step 5 - Dethatch and aerate if needed
If thatch is thicker than about half an inch, mechanical dethatching followed by core aeration improves drainage and disrupts the moist microenvironment the fungus prefers. Do this carefully, however. Aggressive mechanical work on a lawn already weakened by root rot can cause additional damage. A light approach is better than a heavy one.
Step 6 - Resod only after the environment is corrected
It is tempting to patch the bare areas with new sod right away. In most cases, this is premature. New sod planted into soil that still has active fungal populations and hasn't had its pH or moisture conditions corrected will simply develop the same disease again within a season. Wait until conditions are corrected and the disease appears inactive, then resod. Our lawn care and landscaping services include installation guidance to help you resod at the right time and in the right conditions.
Common Mistakes That Make It Worse
A few patterns show up repeatedly in lawns that are struggling to recover from Take-All Root Rot:
- Watering more when the lawn looks stressed. The stressed appearance comes from root death, not drought. More water makes conditions worse for the remaining roots.
- Applying fertilizer to "give the grass a boost." High nitrogen feeding during active infection tends to help the fungus more than the grass.
- Treating only the bare center of the patch. The active disease front is at the edges, not the middle. Treatment should extend several feet beyond the visible damage.
- Giving up too early on fungicide applications. One application rarely eliminates the problem. A consistent program over multiple months is required.
- Ignoring other contributing stressors. Take-All Root Rot often flares up alongside other issues. If you also have nutsedge competing in your lawn or a fire ant problem in the yard, addressing those together gives your turf the best possible environment to recover.
When to Call a Professional
If the affected area is larger than a few hundred square feet, if it is still expanding after you have attempted corrections, or if you are simply not sure what you are dealing with, bringing in a lawn care professional is the smartest move. An experienced eye can confirm the diagnosis, assess how far the disease has spread below the surface, and build a treatment plan that accounts for your specific soil, irrigation, and turf conditions.
We work with homeowners across Bradenton, Lakewood Ranch, Palmetto, Parrish, Ellenton, and Anna Maria Island who are dealing with exactly this problem. If you have questions about what is happening in your lawn, our frequently asked questions page covers many of the most common concerns, and you are always welcome to reach out to us directly for a personalized assessment.
Take-All Root Rot is stubborn, but it is not invincible. With the right diagnosis, the right timing, and a patient, consistent approach, most lawns do come back. The key is understanding that this is a root-level problem that demands a root-level solution.