
New sod turning brown? The first three weeks are everything
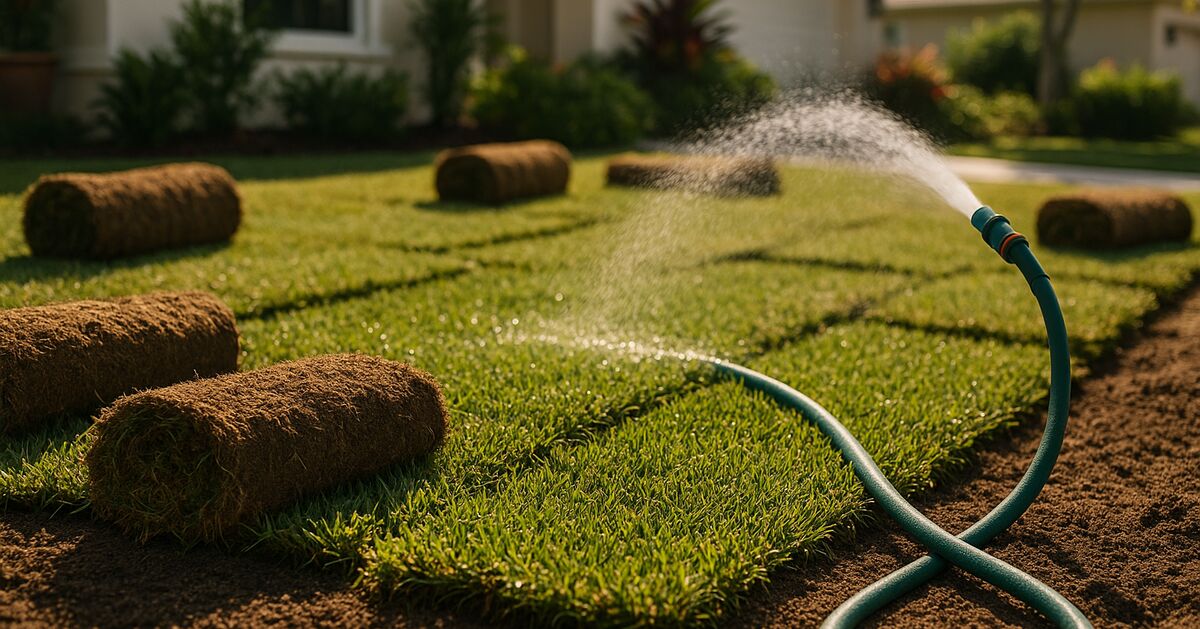
Fresh sod looks perfect the morning it is laid, and then, sometimes within days, the edges start going tan, a seam turns straw-colored, and panic sets in. Before you assume the sod was bad or the installer made a mistake, know this: most new-sod failures come down to what happens in the first three weeks after installation, not what happened before.
Florida's climate is both a gift and a challenge here. The warmth means grass can root quickly. But the intense sun, sandy soil, and unpredictable rain patterns in Bradenton, Lakewood Ranch, Parrish, and the surrounding area also mean new sod dries out faster than almost anywhere else in the country. Understanding why browning happens, and what the grass actually needs hour by hour in those early weeks, is the difference between a lush lawn and a costly re-do.
Why new sod browns in the first place
When sod is cut at the farm, its roots are trimmed to a shallow mat, usually just one to two inches deep. That mat holds the plant together during transport, but it cannot yet draw moisture from the soil beneath your yard. Until the grass sends new roots down into your ground, the only water available to the plant is what you put on top of it.
In Florida's summer heat, that shallow mat can dry out in a matter of hours. Soil temperatures in Manatee County regularly climb above 90 degrees Fahrenheit at the surface during June through September. Add wind, and a newly laid pallet of St. Augustine can be moisture-stressed before the installation crew has even finished the job.
Browning is the grass going dormant or, in the worst cases, dying from desiccation. The leaf blades lose moisture faster than the shallow roots can replace it. Edges and seams brown first because they have the least soil contact and the most air exposure. Corner pieces and spots near concrete or asphalt suffer next because those surfaces radiate additional heat.
The good news: if you catch the browning early and respond correctly, the crowns of the grass plants are often still alive and will recover. The window to save stressed sod is short, though, which is why the right watering schedule needs to start on the same day the sod is laid.
The week-by-week watering plan
Week one: keep it constantly moist
This is the most demanding week. The goal is not deep watering. It is consistent surface moisture, keeping the sod mat and the top inch of soil damp at all times.
For most Florida lawns installed with St. Augustine (the most common choice across Bradenton lawn care and Lakewood Ranch neighborhoods), that means watering two to four times per day during the first seven days. The exact number depends on the time of year, cloud cover, and whether you have afternoon thunderstorms doing some of the work.
A practical schedule for a sunny summer install:
- 6:00 a.m. - run zones for 15 to 20 minutes each before the heat builds
- 11:00 a.m. - a shorter cycle, 8 to 10 minutes, to offset morning drying
- 2:00 p.m. - another 8 to 10 minute cycle at peak heat
- 5:00 p.m. - final cycle before evening, 10 to 15 minutes
If you walk out and press your hand flat on the sod and the soil underneath does not feel damp within two seconds, water immediately regardless of schedule. The schedule above is a guide, not a contract.
One important note: watering this frequently in week one is the exception that proves the rule for Florida. Under normal circumstances, overwatering is a real problem that invites lawn fungal diseases like gray leaf spot and Take-All Root Rot. You are doing this only because the sod has no roots yet. Once roots establish, you must scale back.
Week two: shift toward deeper, less frequent cycles
By day eight or nine, lift a corner of a piece of sod. If you see white or tan root threads beginning to poke down into the soil, rooting has begun. This is your cue to start training the grass to reach downward.
During week two, reduce to twice-daily watering and increase the run time slightly, aiming to wet the soil two to three inches deep. The logic is simple: if water is always sitting at the surface, roots have no reason to grow down. By pulling the moisture slightly deeper, you encourage the roots to follow.
A typical week-two schedule:
- 6:00 a.m. - full cycle, 20 to 25 minutes per zone
- 1:00 p.m. - a midday cycle, 10 to 12 minutes per zone
Check the sod lift test again at day 14. If the sod resists when you tug it lightly, roots are anchoring. If it still peels up easily, extend this phase a few extra days before moving on.
Week three: move toward a normal Florida watering schedule
By day 15 to 21, most properly installed sod in our area has rooted enough to handle once-daily or even every-other-day watering, depending on rainfall. This is when you begin transitioning to the schedule you will maintain long-term: two to three times per week, watering deeply each time to reach four to six inches into the soil.
Watering every day after this point actually makes the lawn weaker over time. Roots stay shallow because they do not need to search for moisture. Shallow-rooted grass is the first to show stress during a dry stretch and the most susceptible to pest and disease pressure.
By the end of week three, you should be able to do the tug test and feel real resistance. The grass should also be growing visibly, and you can plan your first mow.
Common mistakes that cause browning (and how to avoid them)
Relying on rain. Florida's summer rain is afternoon and localized. An inch of rain in Parrish does not mean your yard in Ellenton got anything. Check your soil, not the radar, to know whether the sod is adequately watered.
Watering only at night. Nighttime watering keeps the leaf blades wet for hours, which creates ideal conditions for fungal diseases. Early morning is always the best time. If you must do a midday cycle during week one, that is fine. Avoid watering after 6 p.m. when possible.
Skipping zones. Automatic irrigation systems often have uneven coverage. Walk every zone while it runs during week one to spot dry corners, sprinkler heads pointed the wrong way, or areas blocked by newly laid pallets. Hand-water anything the system misses.
Laying sod over dry soil. The soil beneath the sod should be moist before installation begins. If the ground is bone dry, water it the evening before. Dry soil wicks moisture out of the sod mat from below while the sun attacks from above, and the sod loses on both fronts.
Mowing too soon. New sod should not be mowed until the roots have anchored and the grass has grown at least a half inch above its target height. Mowing before rooting pulls sod loose and tears roots. For St. Augustine, wait until the grass reaches about four inches and mow to three to three and a half inches. The general principles of proper mowing height apply here, but give new sod extra time before that first cut.
Skimping on edges and seams. The spaces between sod pieces dry out faster than the centers. Make sure your irrigation or hand-watering pays extra attention to seams, edges along driveways, and any gaps you can see. Filling gaps with a small amount of soil or sand also helps retain moisture.
What browning looks like versus what dying looks like
Not all tan color is a death sentence. Some varieties, and even healthy sod during a brief dry period, will show some yellowing or light browning that recovers once moisture is restored. Press your fingernail into the crown of the plant (the area right at the soil line). If the tissue is still firm and slightly green or white inside, the plant is stressed but alive. Water it immediately and consistently.
If the crown feels hollow, papery, or completely dried through, that section may be lost. Still water it for several days before giving up entirely. Grass crowns can sometimes survive even when blades appear completely dead, especially in warm temperatures.
True failure looks like sod that does not green up within three to five days of consistent watering, sod that peels back easily with no root threads even after two weeks, or patches that stay tan and papery while surrounding areas recover. In those spots, you may need to re-lay.
Local factors that affect new sod in our area
Sandy soils common across much of Manatee County drain quickly, which is great for avoiding standing water issues but means moisture moves through the root zone fast. You may need slightly more frequent watering during week one than someone in a heavier clay soil area would.
The heat index near the coast in Anna Maria Island and Palmetto, combined with salt-laden breezes, can accelerate moisture loss from leaf blades. New sod on Anna Maria Island properties or in Palmetto waterfront yards may need an extra midday cycle during peak summer heat.
If you are laying sod after a hurricane or storm repair, be aware that soil disturbance, debris, and possible soil compaction from equipment can interfere with rooting. Our post on hurricane-season lawn and yard prep covers how storm conditions affect turf recovery.
Pest pressure can also complicate sod establishment. Mole crickets and their tunneling disrupt root-to-soil contact and cause brown patches that look exactly like drought stress. If you see loose, spongy soil texture or small tunnels, read up on identifying mole cricket damage before assuming it is a watering problem.
After the first three weeks: what a healthy new lawn needs
Once you have made it through the establishment window, the hard part is behind you. Transition to a standard Florida watering schedule. Hold off on fertilizing until the sod has been in the ground at least 30 to 60 days and is visibly growing well. Feeding stressed, not-yet-rooted sod pushes top growth the plant cannot support, and it can burn tender new roots.
Plan your first mow carefully, set the blade high, and never remove more than one-third of the blade height in a single cut. Keep foot traffic to a minimum until the sod feels firmly anchored.
If you want professional eyes on the process, our team works with homeowners across all of our service areas and can assess whether a new install is on track or needs intervention. New sod is a real investment, and the three weeks after installation are not the time to guess.
For a full picture of what we do to support lawns from new installs through long-term maintenance, visit our lawn care and landscaping services page.
The first three weeks are demanding. But they are also finite. Get through them with consistent, attentive watering and you will have a lawn worth every bit of the effort.